


实现文件分片上传-前后端实现
文件分片上传思路分析
分片上传是把一个大的文件分成若干块,一块一块的传输。这样做的好处可以减少重新上传的开销。比如:
如果我们上传的文件是一个很大的文件,那么上传的时间应该会比较久,再加上网络不稳定各种因素的影响,很容易导致传输中断,用户除了重新上传文件外没有其他的办法,但是我们可以使用分片上传来解决这个问题。通过分片上传技术,如果网络传输中断,我们重新选择文件只需要传剩余的分片。而不需要重传整个文件,大大减少了重传的开销。

但是我们要如何选择一个合适的分片呢?
1. 分片越小,那么请求肯定越多,开销就越大(浏览器网络请求也是有并发限制的)。因此不能设置太小。
2. 分片越大,灵活度就少了。
3. 服务器端都会有个固定大小的接收Buffer。分片的大小最好是这个值的整数倍。
因此,综合考虑到推荐分片的大小是2M-5M. 具体分片的大小需要根据文件的大小来确定,如果文件太大,建议分片的大小是5M,如果文件相对较小,那么建议分片的大小是2M。
实现文件分片上传的步骤如下:
-
先对文件进行md5加密。使用md5加密的优点是:可以对文件进行唯一标识,同样可以为后台进行文件完整性校验进行比对。
-
拿到md5值以后,服务器端查询下该文件是否已经上传过,如果已经上传过的话,就不用重新再上传。
-
对大文件进行分片。比如一个100M的文件,我们一个分片是5M的话,那么这个文件可以分20次上传。
-
向后台请求接口,接口里的返回的数据就是我们已经上传过的文件块。
(注意:为什么要发这个请求?就是为了能续传,比如我们使用百度网盘对吧,网盘里面有续传功能,当一个文件传到一半的时候,突然想下班不想上传了,那么服务器就应该记住我之前上传过的文件块,当我打开电脑重新上传的时候,那么它应该跳过我之前已经上传的文件块。再上传后续的块)。
-
开始对未上传过的文件块进行上传。(这个是第二个请求,会把所有的分片合并,然后上传请求)。
-
上传成功后,服务器会进行文件合并。最后完成。
理解Blob对象中的slice方法对文件进行分割及其他知识点
Blob 对象表示一个不可变、原始数据的类文件对象。它的数据可以按文本或二进制的格式进行读取,也可以转换成 ReadableStream 来用于数据操作。
Blob 表示的不一定是 JavaScript 原生格式的数据。File 接口基于 Blob,继承了 blob 的功能并将其扩展以支持用户系统上的文件。
构造函数
-
返回一个新创建的
Blob对象,其内容由参数中给定的数组拼接组成。
根据Blob创建一个 URL
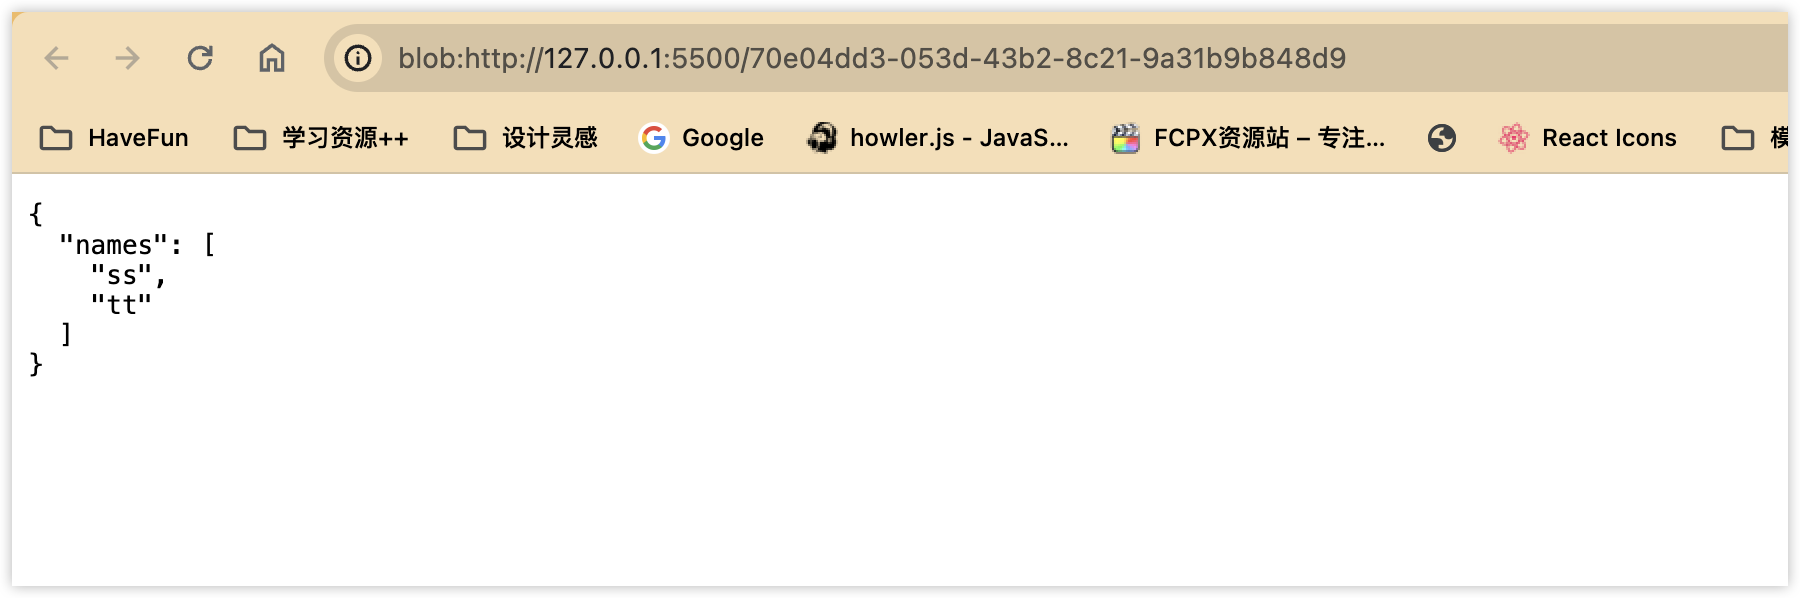
const obj = { names: ["ss", "tt"] };
const blob = new Blob([JSON.stringify(obj, null, 2)], {
  type: "application/json",
});
window.open(URL.createObjectURL(blob));
var xhr = new XMLHttpRequest();
xhr.open(
  "GET",
  "https://blog.quancundexiwang.wang/upload/2023/08/iShot_2023-08-23_16.15.33.png",
  true
);
xhr.responseType = "blob";
xhr.onload = function () {
  if (this.status == 200) {
    var blob = this.response;
    console.log(blob)
    var url = URL.createObjectURL(blob);
    document.getElementById("myImage").src = url;
  }
};
xhr.send();

从 blob 中提取数据
一种读取 Blob 中内容的方式是使用 Response 对象。下述代码将 Blob 中的内容读取为文本:
const obj = { names: ["ss", "tt"] };
const blob = new Blob([JSON.stringify(obj, null, 2)], {
  type: "application/json",
});
new Response(blob).text().then((r) => {
  console.log(r);
  console.log(JSON.parse(r));
});

  <body>
    <input type="file" id="input" />
  </body>

  <script>
    const inputElement = document.getElementById("input");
    inputElement.addEventListener("change", handleFiles, false);
    function handleFiles() {
      const fileList = this.files;
      const file = fileList[0];
      new Response(file).text().then((r) => {
        console.log(r);
      });
    }
  </script>

另一种从 Blob 中读取内容的方法是使用 FileReader。以下代码将 Blob 的内容作为类型化数组读取:
readAsArrayBuffer该方法会按字节读取文件内容,并转换为 ArrayBuffer 对象。readAsArrayBuffer方法读取文件后,会在内存中创建一个 ArrayBuffer对象(二进制缓冲区),会将二进制数据存放在其中。通过此方式,我们就可以直接在网络中传输二进制内容。
其语法结构:
FileReader.readAsArrayBuffer(Blob|File);
const reader = new FileReader();
reader.addEventListener("loadend", () => {
  // reader.result 包含被转化为类型化数组的 blob 中的内容
  console.log(reader.result);
});
const inputElement = document.getElementById("input");
inputElement.addEventListener("change", handleFiles, false);
function handleFiles() {
  const fileList = this.files;
  const file = fileList[0];
  reader.readAsArrayBuffer(file);
}

总之Blob是一种数据类型,用于表示一个不可变、原始数据的类文件对象。我们可以获取到Blob后对Blob进行一些转换,使其变成为我们前端需要的元素,比如图片,文本等等。
blob.slice 方法
blob.slice(startByte, endByte) 是Blob对象中的一个方法,File对象它是继承Blob对象的,因此File对象也有该slice方法的。
参数:
startByte: 表示文件起始读取的Byte字节数。
endByte: 表示结束读取的字节数。
返回值:var b = new Blob(startByte, endByte); 该方法的返回值仍然是一个Blob类型。
我们可以使用 blob.slice() 方法对二进制的Blob对象进行切割,但是该方法也是有浏览器兼容性的,因此我们可以封装一个方法:如下所示:
function blobSlice(blob, startByte, endByte) {
  if (blob.slice) {
    return blob.slice(startByte, endByte);
  }
  // 兼容firefox
  if (blob.mozSlice) {
    return blob.mozSlice(startByte, endByte);
  }
  // 兼容webkit
  if (blob.webkitSlice) {
    return blob.webkitSlice(startByte, endByte);
  }
  return null;
}
SparkMD5
我们使用这个来做MD5
https://www.npmjs.com/package/spark-md5
封装分片类
class SliceUpload {
  file = null;
  filesize = 0;
  chunks = 0; // 总片数
  currentChunk = 0; // 当前处理的分片index
  spark;
  reader;
  chunkSize = 2 * 1024 * 1024; // 切片的大小 2m
  blobSlice =
    File.prototype.slice ||
    File.prototype.mozSlice ||
    File.prototype.webkitSlice; // 兼容性方法
  constructor(file) {
    if (!file) {
      throw new Error("must have a file object !");
    }
    this.file = file;
    this.filesize = file.size;
    this.chunks = Math.ceil(this.filesize / this.chunkSize); // 获取切片的个数
    this.spark = new SparkMD5.ArrayBuffer();
    this.reader = new FileReader();
    this.reader.onload = (e) => {
      const result = e.target.result;
      this.spark.append(result);
      this.currentChunk++;
      if (this.currentChunk < this.chunks) {
        console.log(
          `第${this.currentChunk}分片解析完成,开始解析${
            this.currentChunk + 1
          }分片`
        );
        this.loadNext();
      } else {
        const md5 = this.spark.end();
        console.log("解析完成");
        console.log(md5);
      }
    };
    this.loadNext();
  }
  loadNext() {
    const start = this.currentChunk * this.chunkSize; //
    const end =
      start + this.chunkSize > this.file.size
        ? this.file.size
        : start + this.chunkSize; // 如果当前处理到的字节+分片size超出文件size那么end就切到filesize 否则就继续累加
    this.reader.readAsArrayBuffer(blobSlice.call(this.file, start, end));
  }
}
-
首先我在
input type = 'file'这样的会选择一个文件,然后点击进行上传,先获取文件的大小,然后定义一个分片的大小默认为2兆 -
使用
chunks = Math.ceil(fileSize / chunkSize);获取切片的个数 方法获取切片的个数。例如一个5m的文件 每次分2m那其实是分了3片的,因为最后一片也要分1m -
先初始化当前的 currentChunk 分片为0,然后 reader.onload = function(e) {} 方法,如果当前的分片数量小于 chunks 的数量的话,会继续调用 loadNext()方法,该方法会读取下一个分片,开始的位置计算方式是:var start = currentChunk * chunkSize;
-
currentChunk 的含义是第二个分片(从0开始的,因此这里它的值为1),结束的位置 计算方式为:
**var end = start + chunkSize > file.size ? file.size : (start + chunkSize);**如果一个文件的大小是2.1兆的话,一个分片是2兆的话,那么它就最大分片的数量就是2片了,但是 currentChunk 默认从0开始的,因此第二个分片,该值就变成1了,因此 start的位置就是 var start = 1 * 2(兆)了,然后 var end = start + chunkSize > file.size ? file.size : (start + chunkSize); 如果 start + chunkSize 大于 文件的大小(file.size) 的话,那么就直接去 file.size(文件的大小),否则的话,结束位置就是 start + chunkSize 了。最后我们使用 -
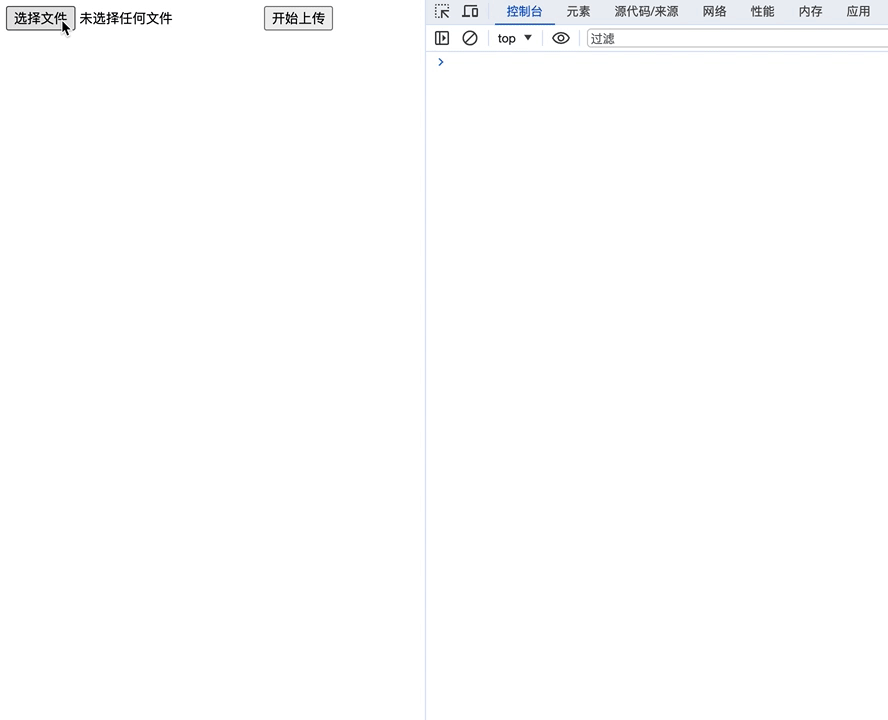
blobSlice 进行切割,就切割到第二个分片的大小了,blobSlice.call(file, start, end),这样的方法。然后把切割的文件读取到内存中去,使用 reader.readAsArrayBuffer() 将buffer读取到内存中去了。继续会调用 onload 该方法,直到 进入else 语句内,那么 const md5 = spark.end(); 就生成了一个md5文件了。如上代码,如果我现在上传一个大文件的话,在控制台中就会打印如下信息了:如下图所示:
使用koa+js实现服务端大文件分片上传实践
切片功能类改造
这里我们为了不让网络请求的一些操作和分片的代码耦合在一起,我们使用callback的方式来做
构造上面 SliceUpload 实例的时候,传入一个回调函数,或者你单独暴露一个成员方法也是一样,这里我就添加一个回调方式吧
constructor(file, cb) // 构造器这里传入一个函数
分片完成的时候执行callback
} else {
  const md5 = this.spark.end();
  console.log("解析完成", this);
  console.log(md5);
  // 这里的参数根据需要改动!
  this.cb({ arr: this.sliceArray, hash: md5, file: this.file });
}
这样我们就可以通过这个回调函数拿到一些信息,然后用这些信息来发送网络请求了
const su = new SliceUpload(file, onSlice);
function onSlice({ arr, hash, file }) {
  for (let i = 0; i < arr.length; i++) {
    const form = new FormData();
    form.append("file", arr[i],hash+i);
    form.append("name", file.name);
    form.append("total", arr.length);
    form.append("index", i);
    form.append("size", file.size);
    form.append("hash", hash);
    console.log(form.values());
    let xhr = new XMLHttpRequest();
    xhr.open("POST", "http://localhost:3000/upload", true);
    xhr.send(form);
  }
}
Koa实现上传功能
const Koa = require('koa');
const cors = require('koa-cors'); // 用于跨域
const Router = require('koa-router'); // http路由功能
const path = require("path")
const fs = require("fs")
const bodyParser = require('koa-bodyparser'); // 请求参数解析到body

const uploadPath = path.join(__dirname, 'uploads');
const uploadTempPath = path.join(uploadPath, 'temp');
// 分片上传的临时文件夹
const upload = require('koa-multer')({ dest: uploadTempPath });
const app = new Koa();
const router = new Router();
app.use(cors());

router.post('/upload', upload.single('file'), async ctx => {
    const {
        index,
        hash
    } = ctx.req.body;
  	// 根据 hash 建立文件夹!内部文件的名称格式为 hash-index
    const chunksPath = path.join(uploadPath, hash, '/');

  	// 如果没有存在文件夹则创建!
    if (!fs.existsSync(chunksPath)) fs.mkdirSync(chunksPath);

  	// 将koa-multer 默认处理的文件名称改为我们需要的 hash-index
    fs.renameSync(ctx.req.file.path, chunksPath + hash + '-' + index);
    ctx.status = 200;
    ctx.res.end('Success');
});

app.use(bodyParser());
app.use(router.routes()).use(router.allowedMethods());
app.listen(3000);
请求测试
看看服务端目录上传的文件是什么样的
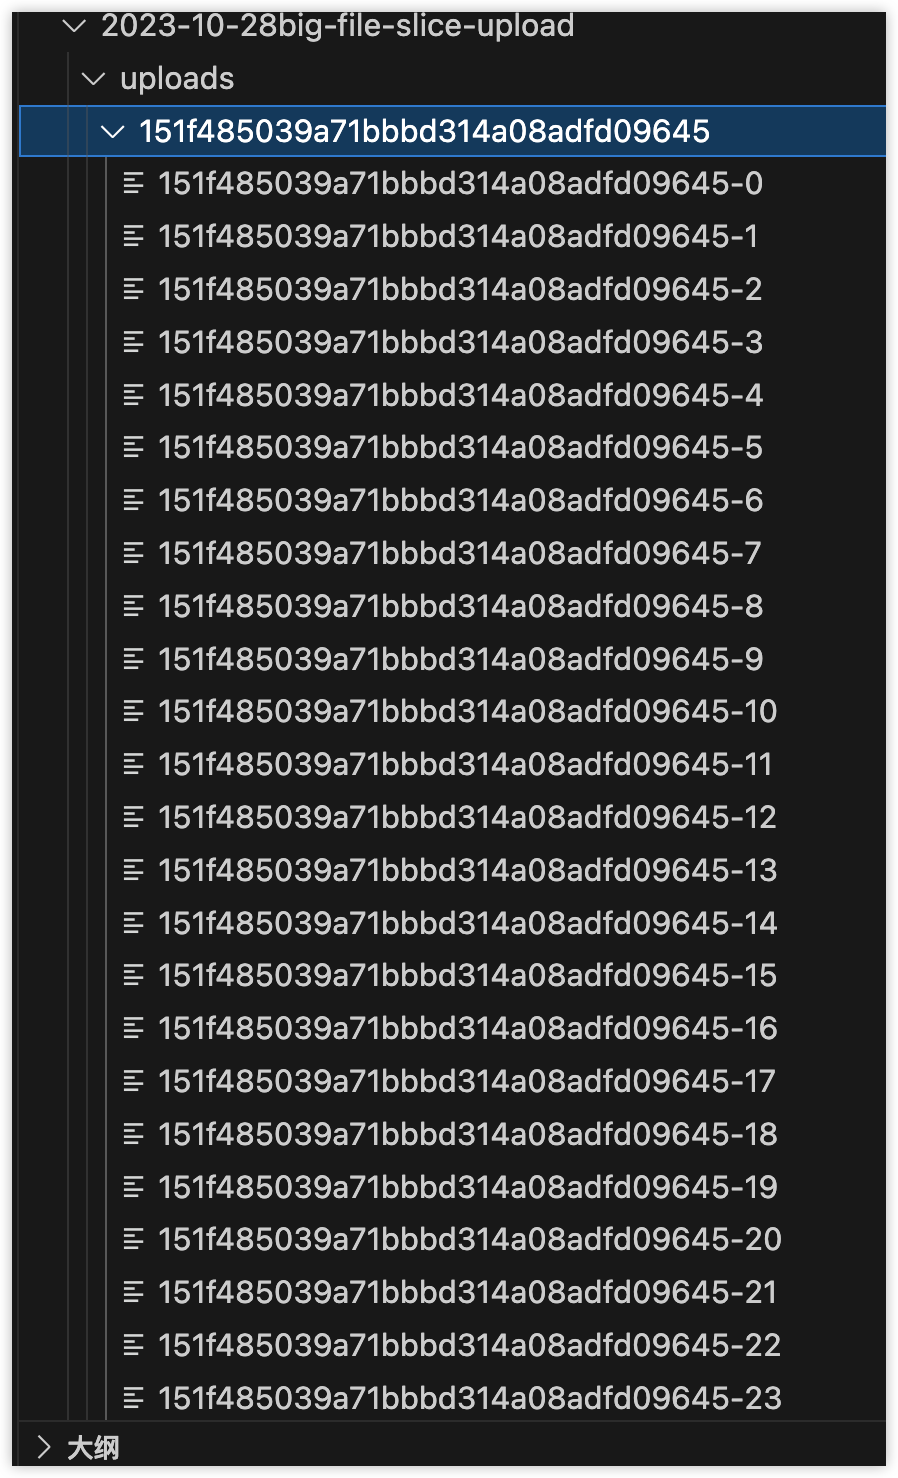
的确是我们预期的效果!
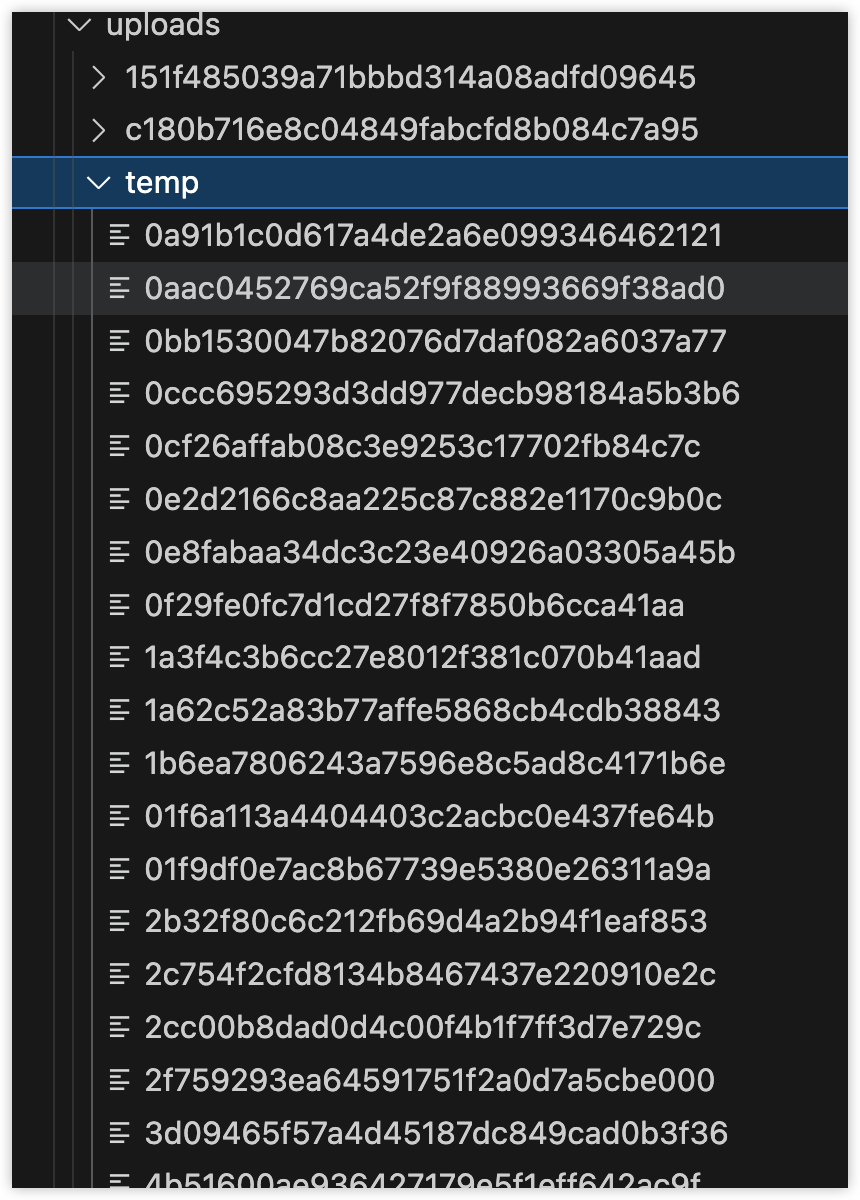
他这里存在一个temp文件夹,是我们使用koa-multer自动帮我们上传的文件,我们自己其实是对文件有一个rename我们想要的格式的操作
fs.renameSync(ctx.req.file.path, chunksPath + hash + '-' + index);
合并文件
合并这里的设计是前端当完成了分片上传的操作,再去单独去调用一个merge的接口!
这里把全部的upload promise放到一个数组中,然后使用promise.all,当all上传完成后,执行merge
function onSlice({ arr, hash, file }) {
  const pall = [];
  for (let i = 0; i < arr.length; i++) {
    const form = new FormData();
    form.append("file", arr[i], hash + i);
    form.append("name", file.name);
    form.append("total", arr.length);
    form.append("index", i);
    form.append("size", file.size);
    form.append("hash", hash);
    pall.push(
      new Promise((resolve) => {
        let xhr = new XMLHttpRequest();
        xhr.open("POST", "http://localhost:3000/upload", true);
        xhr.send(form);
        xhr.onreadystatechange = function () {
          resolve(form);
        };
      })
    );
  }
  Promise.all(pall).then((r) => {
    let xhr = new XMLHttpRequest();
    const aim = r[0];
    let name = aim.get("name");
    total = aim.get("total");
    hash = aim.get("hash");
    xhr.open("POST", "http://localhost:3000/merge", true);
    xhr.setRequestHeader("Content-Type", "application/json");
    xhr.send(
      JSON.stringify({
        name,
        total,
        hash,
      })
    );
  });
}
下面是合并文件的接口
- 合并的时候前端传递 name 文件的真实名称,合并后恢复真身
- total 校验分片的长度是否一致,循环读取每个片的内容
- Hash 用于匹配分片储存的文件夹名称!
router.post('/merge', async (ctx, next) => {
    let {
        name,
        total,
        hash
    } = ctx.request.body;
    // 根据hash值,获取分片文件。
    // 创建存储文件
    // 合并
    total = Number(total)

  	// 根据hash获取分片存的文件夹目录
    const chunksPath = path.join(uploadPath, hash, '/');

  	// 合并后的文件路径
    const filePath = path.join(uploadPath, name);

    // 读取所有的chunks 文件名存放在数组中
    const chunks = fs.readdirSync(chunksPath);
    // 创建存储文件 默认内容为空
    fs.writeFileSync(filePath, '');

  	// 验证chunks和total是否匹配
    if (chunks.length !== total || chunks.length === 0) {
        ctx.status = 200;
        ctx.res.end('切片文件数量不符合');
        return;
    }

  	// 循环total写入分片内容 到储存文件中
    for (let i = 0; i < Number(total); i++) {
        // 追加写入到文件中
        fs.appendFileSync(filePath, fs.readFileSync(chunksPath + hash + '-' + i));
        // 删除本次使用的chunk
        fs.unlinkSync(chunksPath + hash + '-' + i);
    }
    fs.rmdirSync(chunksPath);
    // 文件合并成功,可以把文件信息进行入库。
    ctx.status = 200;
    ctx.res.end('合并成功');
})
效果演示!

完整代码
前端
<!DOCTYPE html>
<html lang="en">
  <head>
    <meta charset="UTF-8" />
    <meta name="viewport" content="width=device-width, initial-scale=1.0" />
    <title>Document</title>
  </head>
  <body>
    <input type="file" id="input" />
    <button id="submit">开始上传</button>
  </body>
  <script src="https://cdnjs.cloudflare.com/ajax/libs/spark-md5/3.0.0/spark-md5.js"></script>

  <script>
    let currentChunk = 0;
    var blobSlice =
      File.prototype.slice ||
      File.prototype.mozSlice ||
      File.prototype.webkitSlice; // 兼容性

    const reader = new FileReader();

    const inputElement = document.getElementById("input");
    const submitBtn = document.getElementById("submit");
    submitBtn.onclick = start;

    function start() {
      const file = inputElement.files[0];
      if (!file) {
        console.log("NO FILE !");
        return;
      }
      const su = new SliceUpload(file, onSlice);
      function onSlice({ arr, hash, file }) {
        const pall = [];
        for (let i = 0; i < arr.length; i++) {
          const form = new FormData();
          form.append("file", arr[i], hash + i);
          form.append("name", file.name);
          form.append("total", arr.length);
          form.append("index", i);
          form.append("size", file.size);
          form.append("hash", hash);
          pall.push(
            new Promise((resolve) => {
              let xhr = new XMLHttpRequest();
              xhr.open("POST", "http://localhost:3000/upload", true);
              xhr.send(form);
              xhr.onreadystatechange = function () {
                resolve(form);
              };
            })
          );
        }
        Promise.all(pall).then((r) => {
          let xhr = new XMLHttpRequest();
          const aim = r[0];
          let name = aim.get("name");
          total = aim.get("total");
          hash = aim.get("hash");
          xhr.open("POST", "http://localhost:3000/merge", true);
          xhr.setRequestHeader("Content-Type", "application/json");
          xhr.send(
            JSON.stringify({
              name,
              total,
              hash,
            })
          );
        });
      }
    }

    class SliceUpload {
      file = null;
      filesize = 0;
      chunks = 0; // 总片数
      currentChunk = 0; // 当前处理的分片index
      spark;
      reader;
      chunkSize = 2 * 1024 * 1024; // 切片的大小 2m
      blobSlice =
        File.prototype.slice ||
        File.prototype.mozSlice ||
        File.prototype.webkitSlice; // 兼容性方法
      formdata;
      sliceArray = [];
      constructor(file, cb) {
        if (!file) {
          throw new Error("must have a file object !");
        }

        this.formdata = new FormData();
        this.file = file;
        this.cb = cb;
        this.filesize = file.size;
        this.chunks = Math.ceil(this.filesize / this.chunkSize); // 获取切片的个数
        this.spark = new SparkMD5.ArrayBuffer();
        this.reader = new FileReader();
        this.reader.onload = (e) => {
          const result = e.target.result;
          this.spark.append(result);
          this.currentChunk++;
          if (this.currentChunk < this.chunks) {
            console.log(
              `第${this.currentChunk}分片解析完成,开始解析${
                this.currentChunk + 1
              }分片`
            );
            this.loadNext();
          } else {
            const md5 = this.spark.end();
            console.log("解析完成", this);
            console.log(md5);
            this.cb({ arr: this.sliceArray, hash: md5, file: this.file });
          }
        };
        this.loadNext();
      }

      loadNext() {
        const start = this.currentChunk * this.chunkSize; //
        const end =
          start + this.chunkSize > this.file.size
            ? this.file.size
            : start + this.chunkSize; // 如果当前处理到的字节+分片size超出文件size那么end就切到filesize 否则就继续累加
        this.reader.readAsArrayBuffer(blobSlice.call(this.file, start, end));
        this.sliceArray.push(blobSlice.call(this.file, start, end));
      }
    }
  </script>
</html>
服务端
const Koa = require('koa');
const cors = require('koa-cors'); // 用于跨域
const Router = require('koa-router'); // http路由功能
const path = require("path")
const fs = require("fs")
const bodyParser = require('koa-bodyparser'); // 请求参数解析到body

const uploadPath = path.join(__dirname, 'uploads');
const uploadTempPath = path.join(uploadPath, 'temp');
// 分片上传的临时文件夹
const upload = require('koa-multer')({ dest: uploadTempPath });
const app = new Koa();
const router = new Router();
app.use(cors());

router.post('/upload', upload.single('file'), async ctx => {
    const {
        index,
        hash
    } = ctx.req.body;
    const chunksPath = path.join(uploadPath, hash, '/');
    if (!fs.existsSync(chunksPath)) fs.mkdirSync(chunksPath);
    fs.renameSync(ctx.req.file.path, chunksPath + hash + '-' + index);
    ctx.status = 200;
    ctx.res.end('Success');
});


router.post('/merge', async (ctx, next) => {
    let {
        name,
        total,
        hash
    } = ctx.request.body;
    // 根据hash值,获取分片文件。
    // 创建存储文件
    // 合并
    total = Number(total)

    // 根据hash值找到文件分片的目录
    const chunksPath = path.join(uploadPath, hash, '/');

    // 合并之后的文件路径 name真实的文件夹名称
    const filePath = path.join(uploadPath, name);
    // 创建存储文件
    fs.writeFileSync(filePath, '');

    // 读取所有的chunks 文件名存放在数组中
    const chunks = fs.readdirSync(chunksPath);
    if (chunks.length !== total || chunks.length === 0) {
        ctx.status = 200;
        ctx.res.end('切片文件数量不符合');
        return;
    }
    for (let i = 0; i < total; i++) {
        // 追加写入到文件中
        fs.appendFileSync(filePath, fs.readFileSync(chunksPath + hash + '-' + i));
        // 删除本次使用的chunk
        fs.unlinkSync(chunksPath+ hash + '-' + i);
    }
    fs.rmdirSync(chunksPath);
    // 文件合并成功,可以把文件信息进行入库。
    ctx.status = 200;
    ctx.res.end('合并成功');
})
app.use(bodyParser());
app.use(router.routes()).use(router.allowedMethods());
app.listen(3000);
评论区